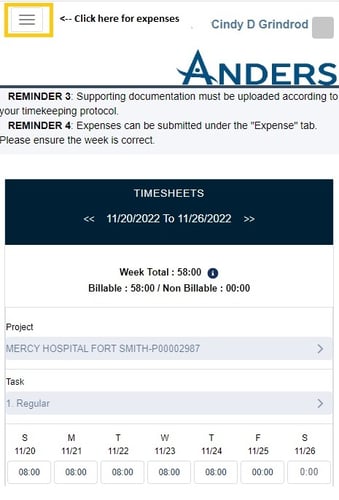
Guide to Uploading Expenses in Your Timecard
Expenses that have been agreed to in your contract will need to be submitted with your electronic timecard for them to be reimbursed in your weekly pay. Please follow these instructions.
Take photos of saved receipts or proof of expense. These will need to be available on the device you are using to be uploaded.
Desktop
.jpg?width=500&height=401&name=Stephen%20Photo%20(7).jpg)
Mobile

Step 4.
Click on “Add New Expense” button and select the Project and Category of your expense, enter the amount in dollars. If you are submitting mileage, enter the number of miles. Click upload files to upload the image of your receipt and Click Save.
Desktop:
Mobile:
.jpg?width=500&height=345&name=Stephen%20Photo%20(9).jpg)
-1.jpg?width=480&height=828&name=Stephen%20Photo%20(10)-1.jpg)
Step 5.
Once you have uploaded all expenses for that week, you must click “Submit for Approval”. This will notify payroll and you are finished. You will not be able to make any further changes. If needed, please contact timecards@andersgroup.org.
Step 6.
If your expenses are rejected you will receive an email with the reason why. You will then need to make adjustments based on feedback.
If you have further questions, please visit our Timecard FAQ section. If you are help entering your timecard you can also visit our Completed Your Timecard Guide.


.png)